
If you’ve got files you’d rather others couldn’t access, locking them up with a password can be the simplest way to get peace of mind. Windows has built-in support for basic password protection, letting you keep your files safe from prying eyes.
Before we get started, we should offer a warning – while this method is simple and effective, it’s not intended for large-scale or mission-critical use. It goes without saying you should invest in purpose-built encryption software if you’re storing really sensitive information on your device.
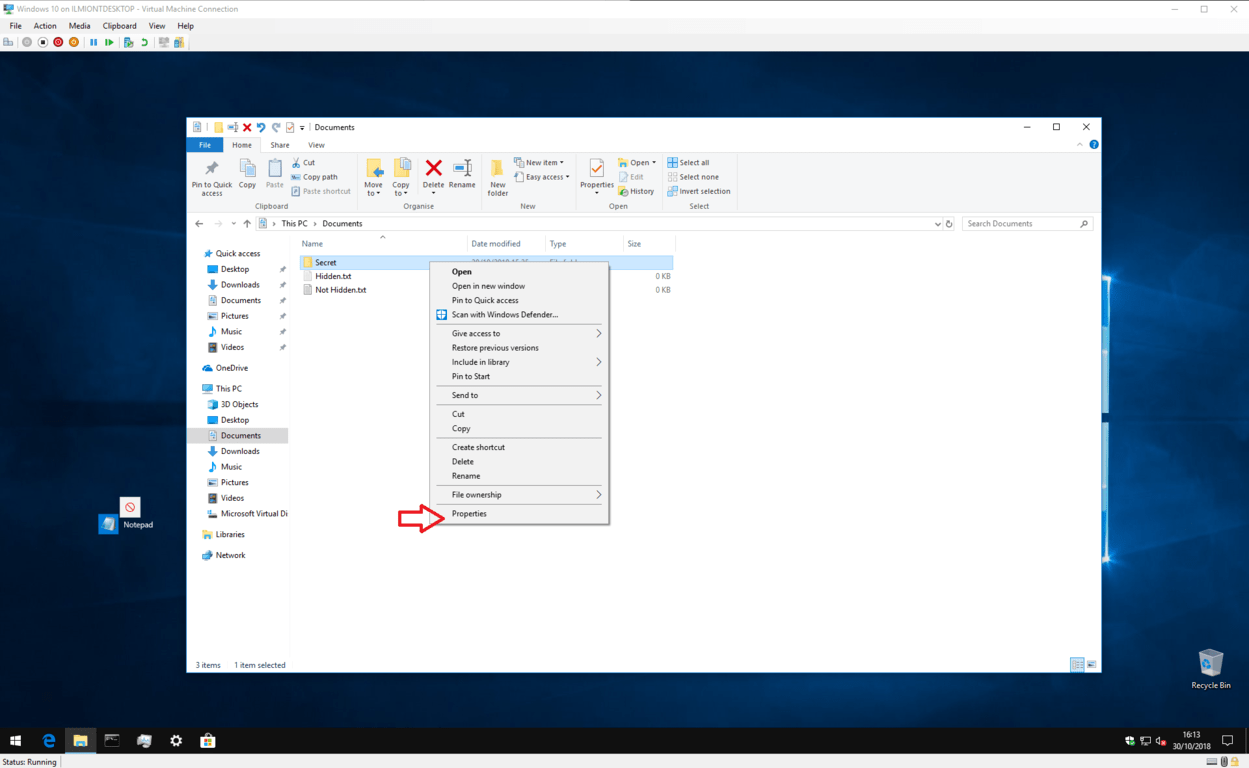
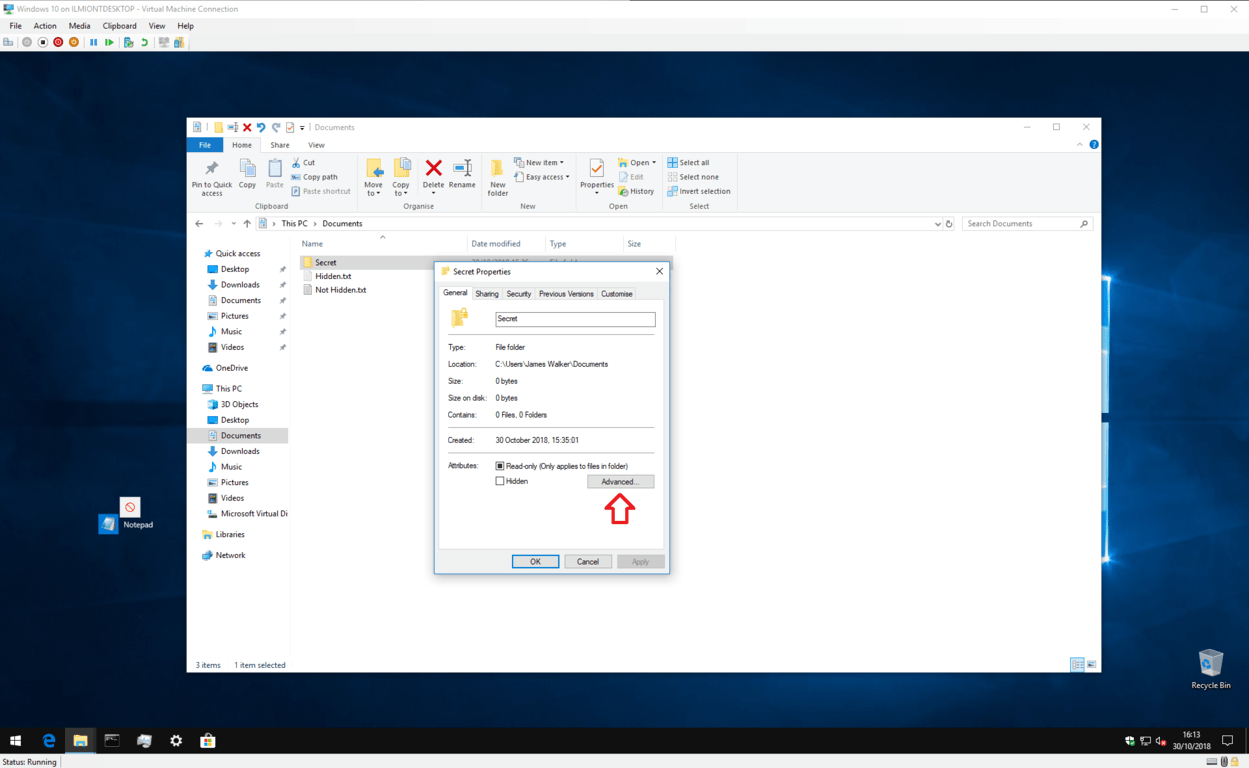
To begin, use File Explorer to find the file or folder you wish to protect. Right-click on it and click “Properties” at the bottom of the context menu. From here, press the “Advanced…” button in the Attributes section of the window.
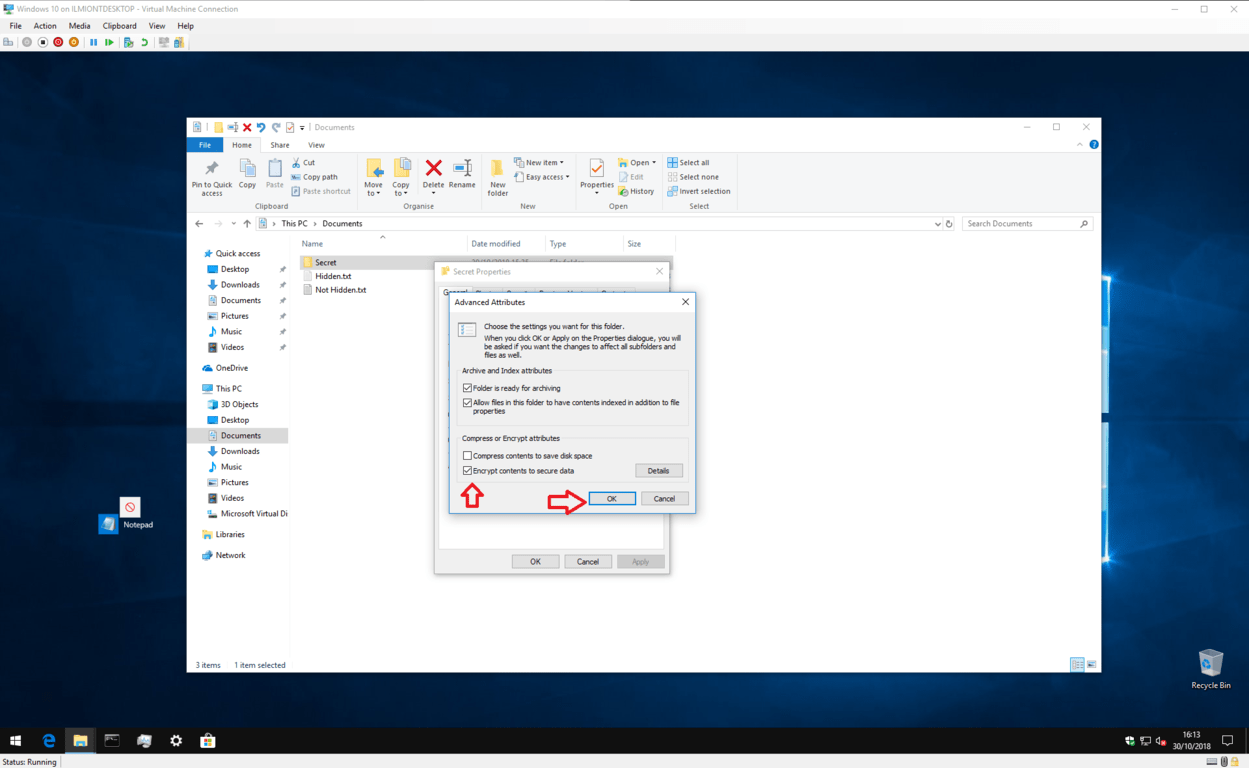
At the bottom of this pane, tick the “Encrypt contents to secure data” checkbox. Click the “OK” button to get back to the main Properties window. Now press “Apply” and Windows will begin to encrypt your files.
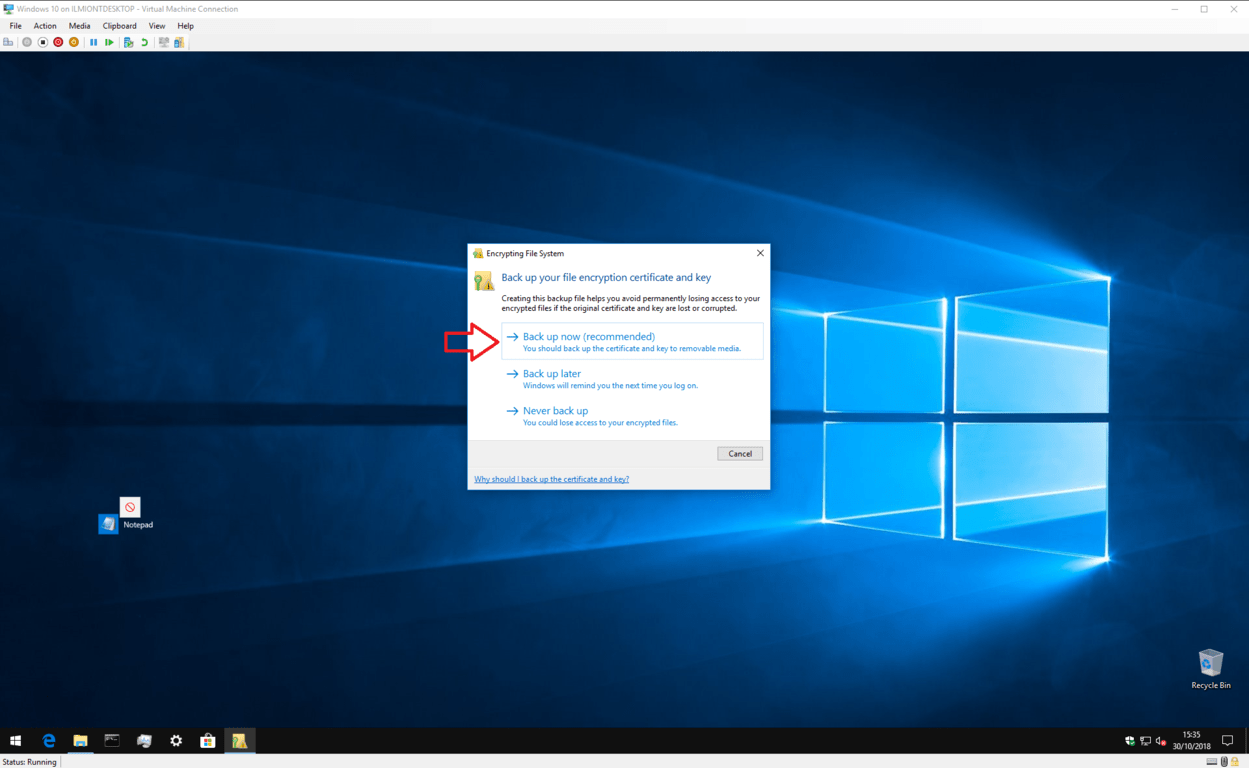
When the process completes, you’ll be prompted to back-up your encryption key if you’ve never used the feature before. Click the toast notification and follow the prompts to make a note of your encryption key. You’ll need this information if you ever lose access to your encrypted files, so it’s important you take the time to back it up now.
With the back-up done, your files are now secured. They’re encrypted with a key that’s tied down to your Windows user account. If anyone else tries to access the file – whether from another user account, or by physically removing your hard drive – the contents will appear to be meaningless garbled text.
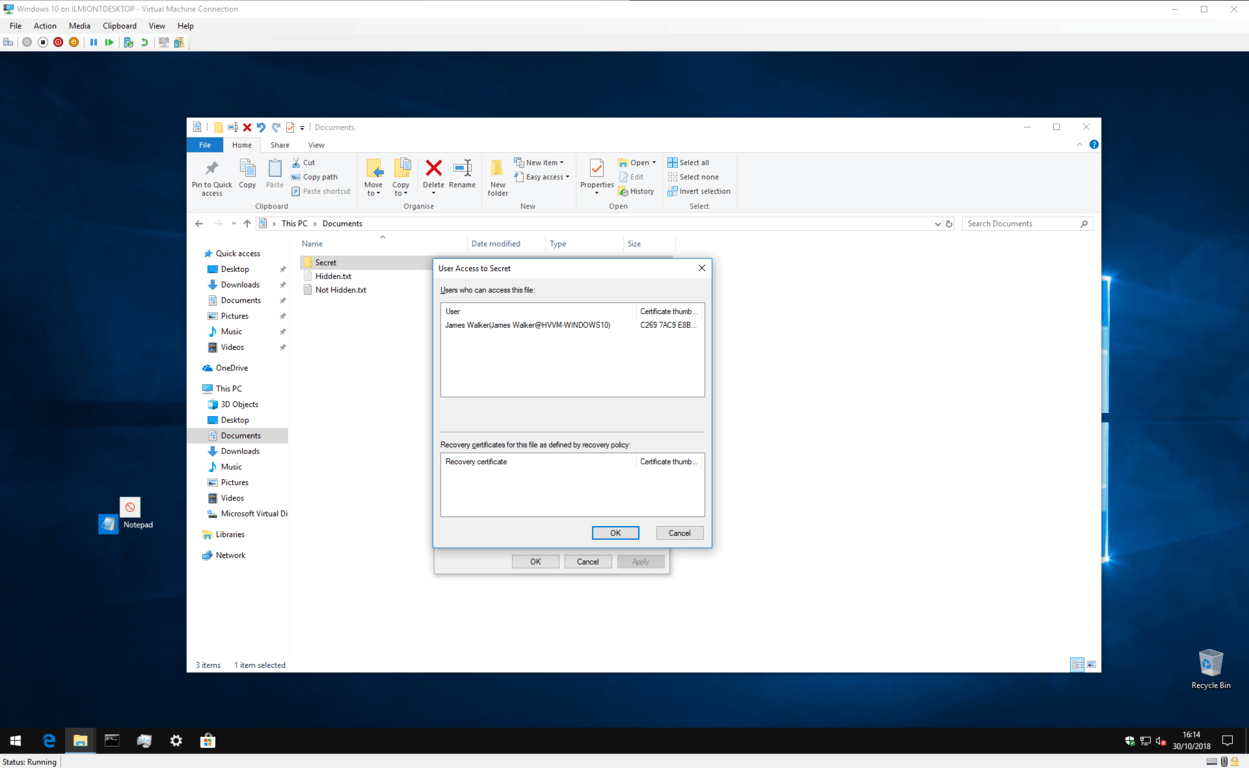
You can reverse the encryption at any time by heading back to the Properties window and opening the Advanced Attributes pane again. Just untick the “Encrypt contents to secure data” checkbox and click OK to close the windows. After encryption, you can also press the “Details” button next to the checkbox to see information about the encryption certificate and available recovery procedures.
That’s all there is to it. Once again, we’ll remind you this method isn’t intended for high-security purposes. However, it’s ideal if you’re using a shared PC and just want to keep some files inaccessible to other user accounts on the device. Just remember to lock your account (Win+L) whenever you walk away from the screen – your files will be unencrypted as soon as you login!
If you need stronger protections, you might want to consider investing in third-party software that’s specially designed for this purpose. Enabling Windows’ BitLocker feature (Pro and Enterprise edition only) can also give peace of mind if you want all your files to be encrypted. This offers full-disk encryption with the keys tied down to a TPM, a hardware module dedicated to certificate storage.
BitLocker operates at a different level to file-based encryption, solving different problems. The feature encrypts the entire drive, not individual files – so once Windows starts, everything on the drive is decrypted and made available to everyone. File-based encryption gets unlocked only after you login, and deals with individual files and folders.
